A dirty vaporizer produces worse flavor, weaker vapor, and higher draw resistance within 3-5 sessions. Cleaning takes under 10 minutes, costs almost nothing, and restores your vape to near-new performance every time.
We clean every vaporizer we test at VapeExperts, and the difference between a freshly cleaned oven and one that's gone 10+ sessions is obvious in both taste and airflow. This guide covers the exact method we use, from quick post-session maintenance to full deep cleans, with vaporizer-specific tips for the most popular vapes on the market.
Whether you own a portable like the Mighty+ or a desktop like the Volcano Hybrid, the core process is the same. Adapt the frequency and technique to your vaporizer, and you'll get better flavor, stronger extraction, and a longer lifespan from it.
Clean after every 3-5 sessions for best results
Most users should do a quick clean after every 3-5 sessions and a deep clean every 2-4 weeks. If you vape at high temperatures (above 210°C), residue builds faster, so lean toward the shorter end of that range.
A quick clean takes about 2 minutes. A deep clean takes 10-15 minutes, most of which is passive soak time. Skipping maintenance for 20+ sessions leads to clogged screens, restricted airflow, and a burnt taste that no amount of temperature adjustment can fix.
Supplies you need
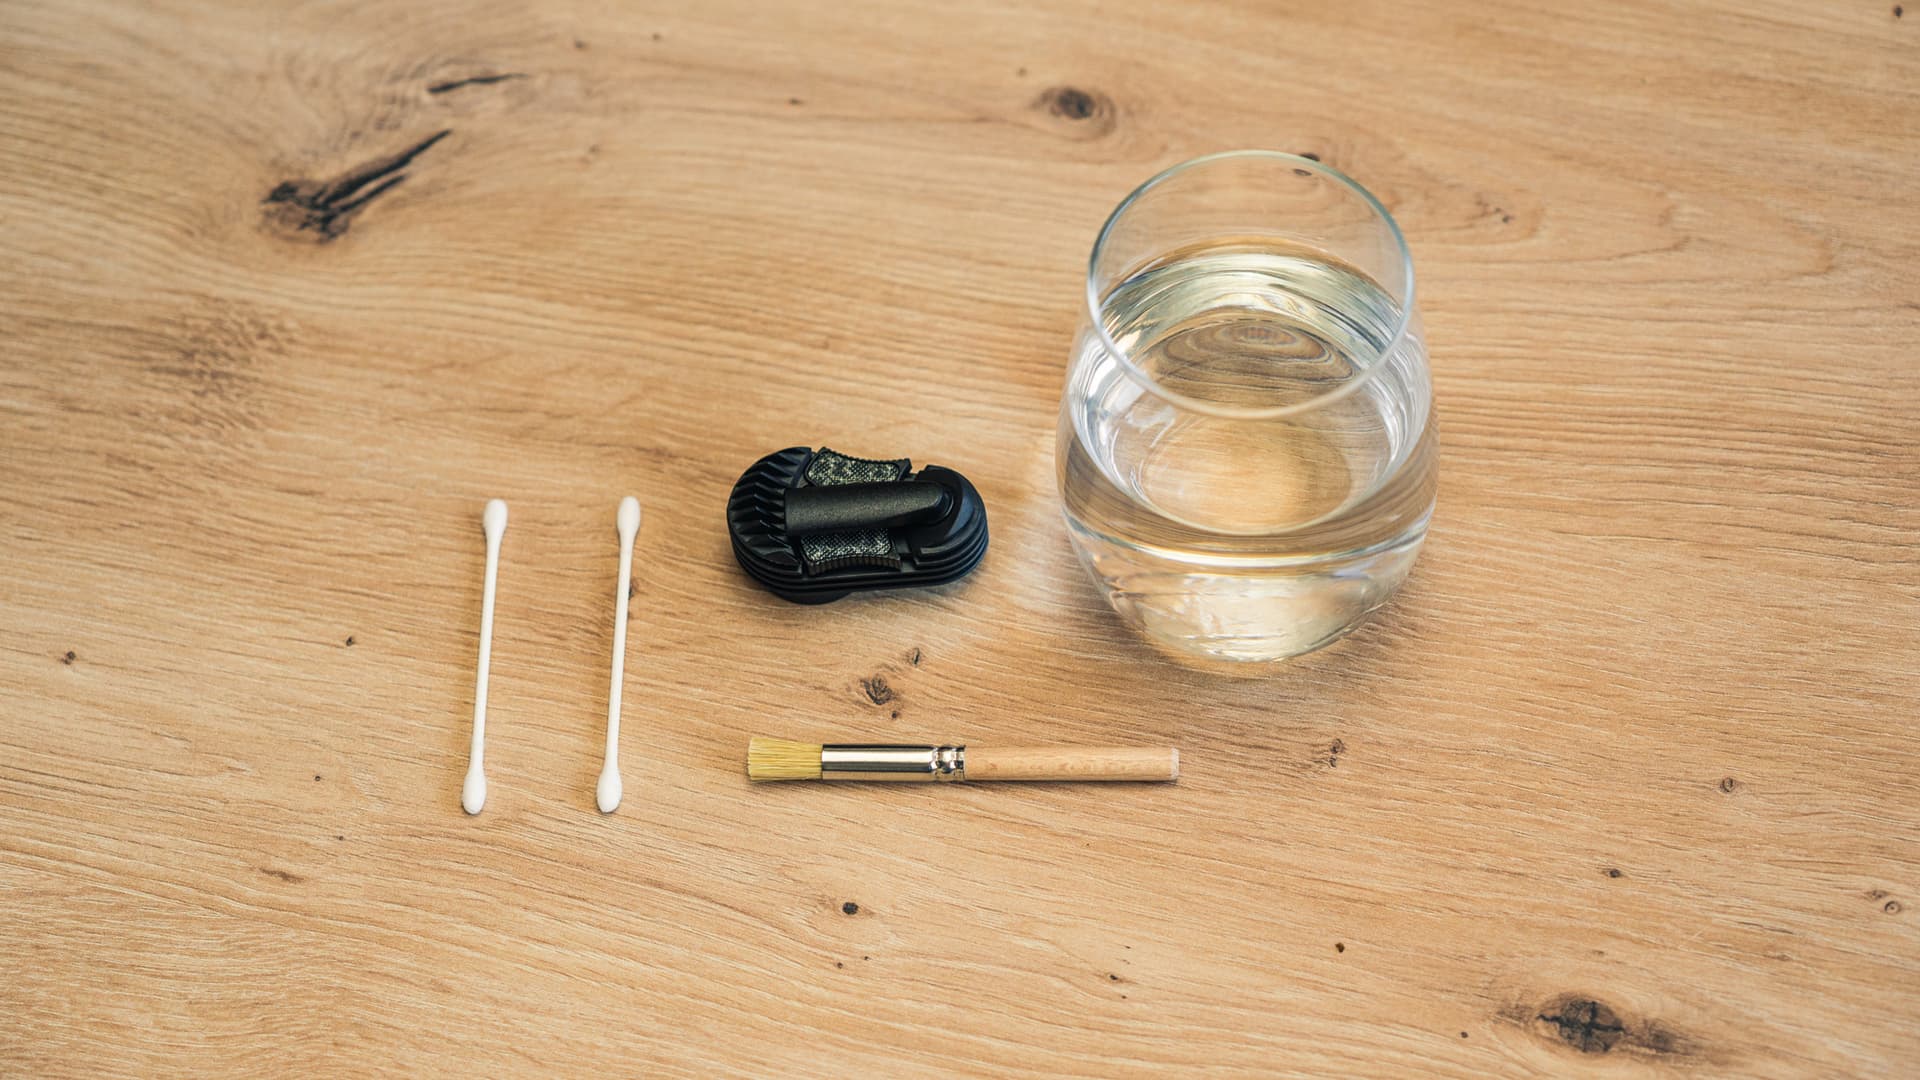
You do not need specialty cleaning products. Here is what we use for every vaporizer in our testing lab:
- Isopropyl alcohol (90% or higher): 99% is ideal, but 91% works. Lower concentrations leave too much water residue.
- Cotton swabs (Q-tips): standard size for ovens, pointed tips for tight spots.
- Small cleaning brush: most vapes ship with one. A soft-bristle toothbrush works as a backup.
- Paper towels or microfiber cloth: for drying and wiping exteriors.
- Small container or zip-lock bag: for soaking removable parts.
- Pipe cleaners: for vapor paths and glass stems.
Avoid using water inside the oven or on electronics. Isopropyl alcohol evaporates cleanly and dissolves cannabis resin on contact, which is why it is the standard cleaning solution for every vaporizer type.
Tip
How to clean the oven in 3 steps
The oven (also called the chamber) is where residue accumulates fastest. Leftover plant material chars against the heated walls and degrades flavor within a few sessions.
Step 1: Empty the AVB while warm
After your last session, turn the vaporizer upside down and tap out the spent cannabis while the oven is still warm. Warm residue is loose and falls out easily. Cold residue sticks to the walls and requires scraping. Save your AVB (already vaped bud) if you want to repurpose it in edibles.
Step 2: Brush out remaining particles
Use the included cleaning brush or a dry cotton swab to sweep out any remaining material. For conduction ovens (like the PAX Mini 2), brush the walls and the bottom plate where direct contact causes the most buildup. For convection vapes (like the Tinymight 2), focus on the screen at the bottom of the chamber.
Step 3: Swab with isopropyl alcohol
Dip a cotton swab in isopropyl alcohol and wipe the interior walls of the oven. The alcohol dissolves sticky resin instantly. Use a fresh swab if the first one comes out dark brown. One or two swabs is enough for a quick clean. Three or more means you waited too long between cleanings.
Never pour isopropyl alcohol directly into the oven. Apply it to the swab only. Excess liquid can seep into electronics and damage the heater.

One to two swabs means a well-maintained oven. Three or more means you waited too long. The dark residue is charred plant oil baked onto the walls.
How to clean the cooling unit and vapor path
The cooling unit is the component between the oven and your mouth. It cools the vapor before inhalation, but it also collects the most resin over time. Storz & Bickel vapes (the Venty, Mighty+, and Crafty+) have a dedicated plastic cooling unit that disassembles into multiple parts. Other brands use glass stems, silicone tubing, or metal vapor paths.
Storz & Bickel cooling units
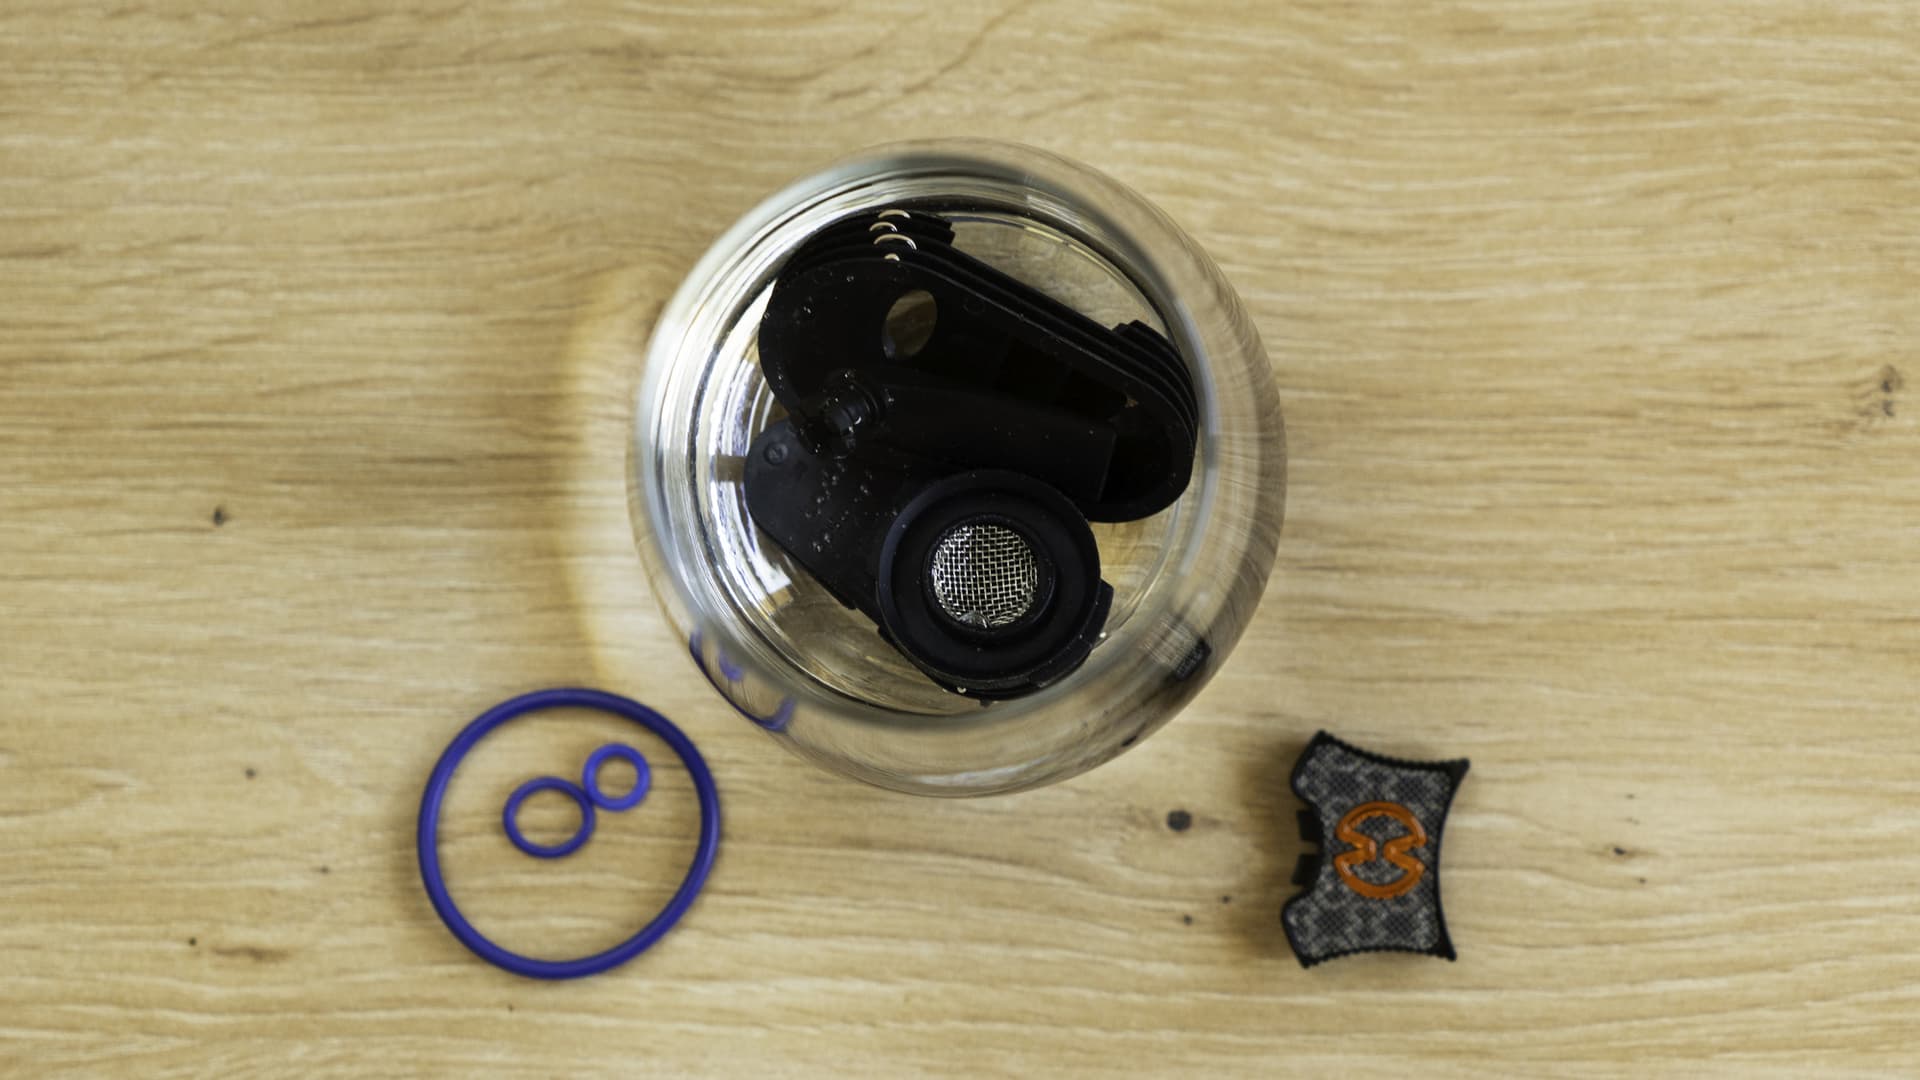
Disassemble the cooling unit completely. Drop all plastic and metal parts into a zip-lock bag with enough isopropyl alcohol to submerge them. Seal the bag and let it soak for 30-60 minutes. Shake occasionally. After soaking, rinse every piece under warm water and let them air dry completely before reassembling.
The cooling unit on Storz & Bickel portables collects a honey-colored resin that builds up on the ridged fins inside. This resin is actually reclaim, and some users save it. But leaving it in place restricts airflow and makes every draw feel tighter.

Five pieces, 30-second disassembly. Soak plastic and metal in alcohol; keep O-rings on a dry paper towel (ISO dries them out past 30 minutes).
Glass stems and mouthpieces
Vapes with glass vapor paths, like the Arizer Solo 3, are the easiest to clean. Drop the glass stem into isopropyl alcohol for 15-30 minutes, then push a pipe cleaner through the tube. Rinse with warm water. The glass comes out crystal clear.
Glass stems offer a visual advantage: you can see the buildup. When the inside of the stem turns amber, it is time to clean. Clear glass means clean vapor.
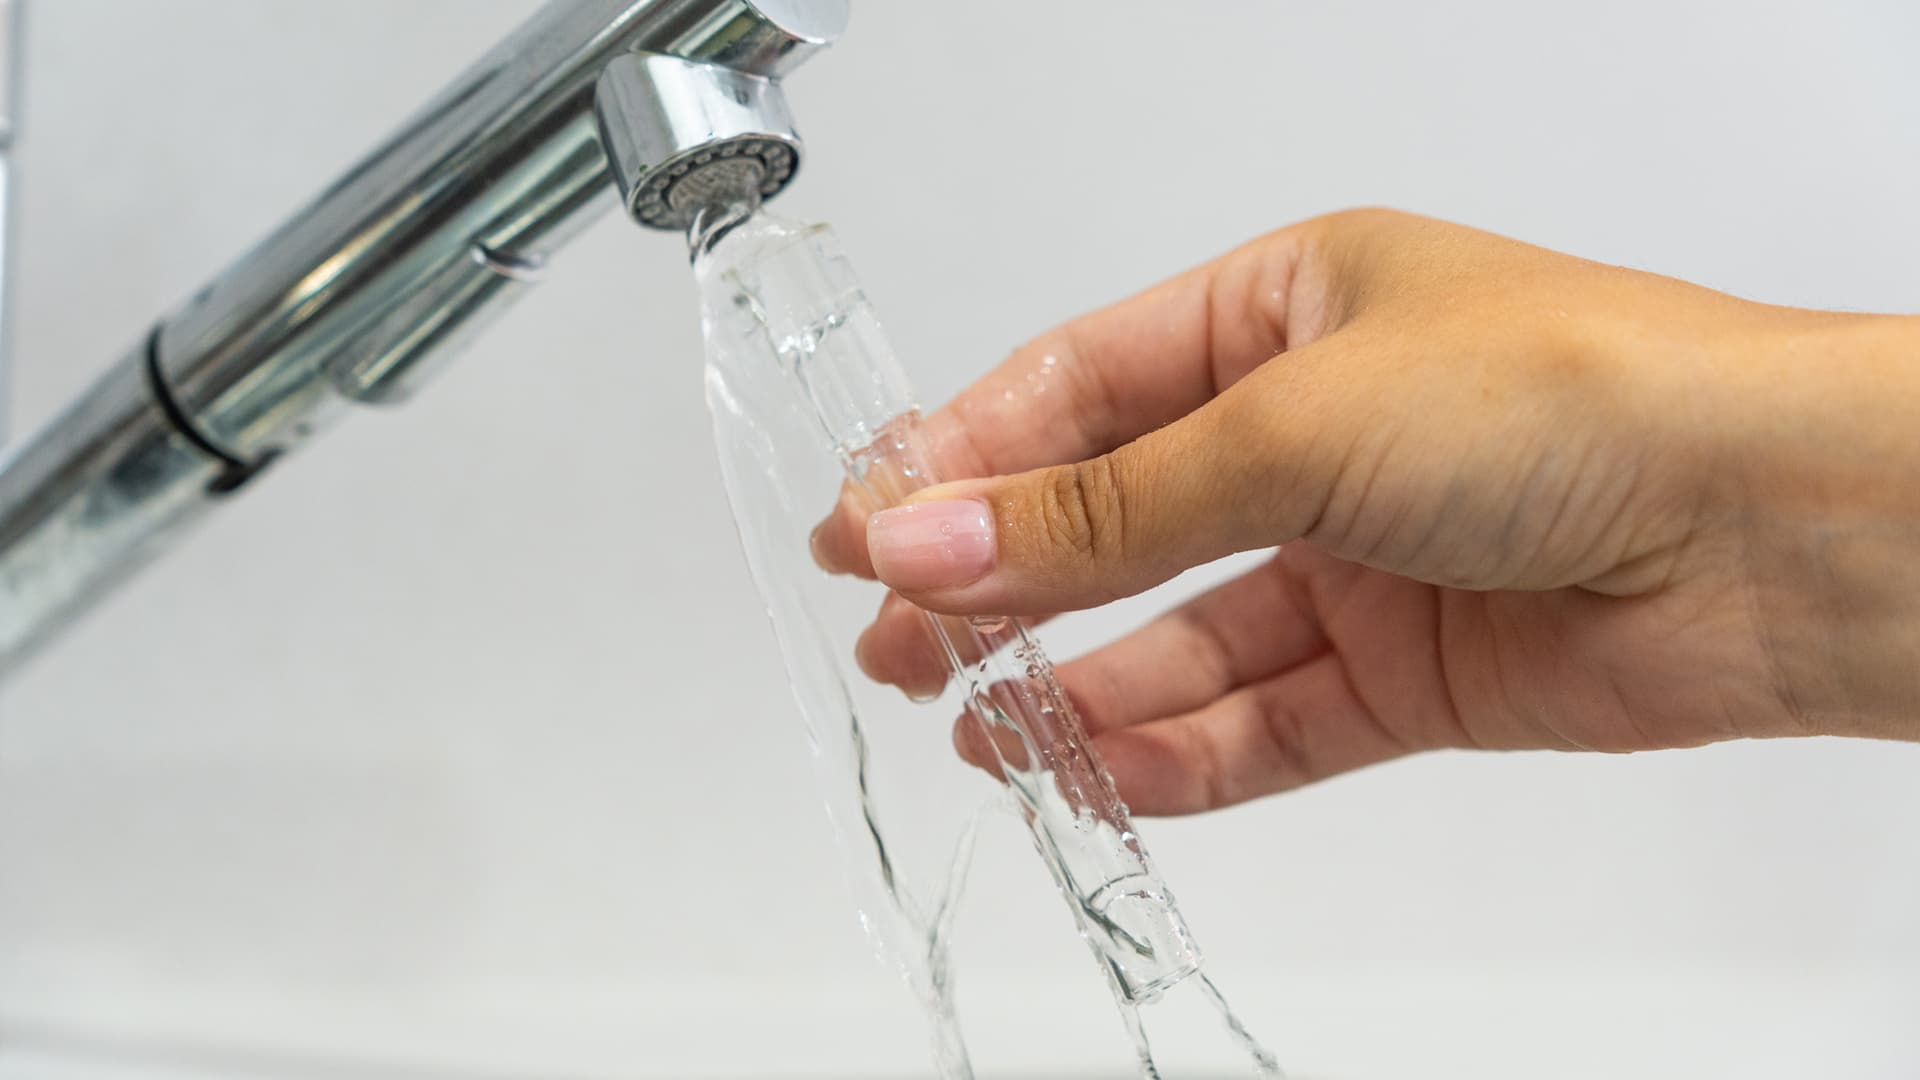
Glass stems show you exactly when they need cleaning. Amber buildup is visible through the walls. A 15-minute ISO soak restores them to crystal clear.
Metal and ceramic vapor paths
For vapes with enclosed metal or ceramic paths (like the DaVinci IQ3), run an alcohol-dipped pipe cleaner or cotton swab through the airpath opening. Repeat until the swab comes out clean. These paths are harder to inspect visually, so cleaning on a regular schedule matters more.
When and how to replace screens
Screens are the small mesh filters that keep plant material out of the vapor path. They clog over time, even with regular cleaning.
Replace screens when cleaning no longer restores airflow, or when you notice dark staining that isopropyl alcohol cannot remove. For most users, that is every 4-8 weeks with regular use. Many manufacturers include spare screens in the box, and replacement packs typically cost a few dollars.
To remove a screen, use a toothpick or the pointed end of a cleaning tool to gently pry it from its seat. Press the new screen into place with your finger or the flat end of a tool. Make sure it sits flush. A poorly seated screen lets debris pass through and clogs the vapor path downstream.
If you use dosing capsules, your screens stay cleaner for much longer. The capsule contains the cannabis and prevents direct contact between the herb and the oven walls or screen. This is the single most effective way to reduce cleaning frequency.
The dosing capsule shortcut to cleaner ovens
Capsules cut oven cleaning frequency by 50-70% because the cannabis never touches the chamber walls. Here's how to load them, which vapes support them, and when they're worth it.
Deep cleaning your vaporizer every 2-4 weeks
A deep clean goes beyond the oven and cooling unit. Here is the full process we follow at VapeExperts:
- Disassemble everything removable. Mouthpiece, cooling unit, screens, O-rings, glass stems. Consult your manual if you are unsure what comes apart.
- Soak all non-electronic parts in isopropyl alcohol for 30-60 minutes. Use a small glass jar or zip-lock bag.
- Clean the oven with alcohol-dipped swabs. Use 3-4 swabs, rotating to a clean side each pass, until no residue transfers.
- Clean the vapor path with pipe cleaners. Push an alcohol-soaked pipe cleaner through any tube or channel the vapor travels through.
- Wipe the exterior with a damp cloth. Isopropyl alcohol works on metal and plastic exteriors. Avoid getting moisture in charging ports or button openings.
- Rinse all soaked parts under warm running water. This removes dissolved resin and residual alcohol.
- Dry everything completely. Air dry for at least 1-2 hours, or pat dry with a lint-free cloth. Reassembling with moisture inside causes problems.
- Run a burnoff cycle. Turn the vaporizer on to its highest temperature setting and let it run one full session empty. This evaporates any remaining alcohol and residue. The first draw after a burnoff should taste clean and neutral.
Most of a deep clean is passive soak time. Thirty to sixty minutes in ISO does the work, and you just rinse and dry after.
Warning
Device-specific tips that save time
Different heating systems and materials require slightly different approaches:
| Heating Type | Example Devices | Key Cleaning Pattern |
|---|---|---|
| Hybrid | Mighty+, Venty | Cooling unit clogs as fast as the oven, so keep a spare on rotation |
| Pure convection | Tinymight 2, Rogue 2 | Oven stays clean; screen and vapor path collect most residue |
| Desktop | Volcano Hybrid | Less frequent oven cleaning; replace balloon bags every 50–100 fills |
| Ball vape | Various | Soak balls (ruby, SiC, zirconia) in ISO every few weeks |
For desktop tube vapes, push an alcohol-soaked cloth through with a wooden dowel every few months. Storz & Bickel sells replacement cooling units for their portables, and keeping a spare on rotation eliminates downtime.
How to keep your vaporizer cleaner between deep cleans
Prevention reduces cleaning effort by half. These habits take seconds and extend the time between deep cleans.
Empty the oven immediately after each session. Warm AVB dumps cleanly. Cold AVB sticks and chars onto the walls during the next session.
Use dosing capsules if your vape supports them. The Mighty+, Venty, and Crafty+ all work with Storz & Bickel capsules. The capsule takes the residue instead of the oven. Toss the used capsule, drop in a fresh one, and the oven stays almost pristine.
Brush the oven after every session. A 10-second brush after emptying prevents buildup from hardening between cleans.
Store your vape upright. Resin flows downhill. Storing a vape on its side can cause sticky residue to migrate into the vapor path or mouthpiece. If your vape struggles with poor airflow or common performance issues, check whether storage position is contributing.
Use a medium grind. Too fine a grind clogs screens faster. A medium consistency, as described in our grinding guide, keeps airflow open longer.
Tip
What happens if you never clean your vaporizer?
Skipping cleaning does not just hurt flavor. It creates real performance problems that compound over time.
Restricted airflow forces you to draw harder, pulling loose particles into the vapor path. Clogged screens reduce vapor production. Charred residue releases off-flavors that mask terpenes in fresh cannabis. In extreme cases, hardened resin prevents the cooling unit from seating properly, causing air leaks. We've tested vapes after 30+ sessions without cleaning. A 10-minute deep clean every few weeks is the cheapest upgrade you can make to flavor and vapor production.
Key Takeaway
- Quick clean every 3–5 sessions: alcohol-dipped swab in the oven, 2 minutes
- Deep clean every 2–4 weeks: soak all non-electronic parts in 90%+ ISO for 30–60 minutes
- Replace screens every 4–8 weeks: when alcohol no longer restores airflow
- Empty warm, brush dry: prevents residue from charring onto oven walls
- Dosing capsules halve cleaning effort: herb never touches the oven walls